Minecraft is undoubtedly one of the most beloved games worldwide, and its versatility makes it accessible across nearly every platform—including Chromebooks. Given the convenience and portability of Chrome OS, it’s no wonder players seek ways to enjoy Minecraft on these devices. The good news is that running Minecraft on a Chromebook is entirely feasible. Let’s dive into the specifics and explore how to set it up effectively.
General Information About Minecraft on a Chromebook
Minecraft’s popularity stems from its creative freedom and adaptability, making it a perfect fit for the lightweight yet powerful Chrome OS. However, to ensure a seamless experience, your Chromebook must meet certain technical requirements. Here’s what you need:
- System Architecture: 64-bit (x86_64, arm64-v8a)
- Processor: AMD A4-9120C, Intel Celeron N4000, Intel 3865U, Intel i3-7130U, Intel m3-8100Y, Mediatek Kompanio 500 (MT8183), Qualcomm SC7180 or better
- RAM: 4 GB or more
- Storage: At least 1 GB of free space
While these are the baseline requirements, some older models might struggle with performance. For those cases, we’ll cover optimization tips later in the article.
Enabling Developer Mode
To run Minecraft natively on a Chromebook, you’ll first need to enable Developer Mode. This grants access to advanced features, including the ability to install third-party applications via Linux-based tools.
- Open the Settings menu by clicking the clock icon in the bottom-right corner.
- Navigate to the “Advanced” section and select “Developers.”
- Toggle the switch labeled “Linux (Beta)” to enable the Linux development environment.
- Follow the prompts to complete the setup. Once finished, you’ll gain access to the Terminal—a powerful tool akin to the Command Prompt in Windows.
Installing Minecraft on Chromebook
With Developer Mode enabled, you’re ready to install Minecraft. While the easiest route is downloading the Bedrock Edition from the Google Play Store, this method comes with a price tag of $20. If you already own the Android version (which costs $7), you’ll only need to pay an additional $13 to upgrade.
Alternatively, for those seeking a free or more customizable experience, installing Minecraft via the Linux terminal offers a deeper dive into the game’s mechanics. Below is a step-by-step guide to help you achieve this.
Step 1: Update Your System
Before proceeding, ensure your Chromebook’s Linux environment is updated.
sudo apt update && sudo apt upgrade -yStep 2: Install Java Runtime Environment (JRE)
Minecraft relies heavily on Java, so installing JRE is essential.
sudo apt install default-jre -yStep 3: Download the Latest Version of Minecraft
Navigate to the official Minecraft website and copy the download link for the latest version.
cd ~/Downloads
wget
Step 4: Run the Installer
Make the installer executable and run it.
chmod +x minecraft-installer.jar
./minecraft-installer.jar
Step 5: Launch Minecraft
Once installed, launch Minecraft directly from the Terminal.
minecraft-launcher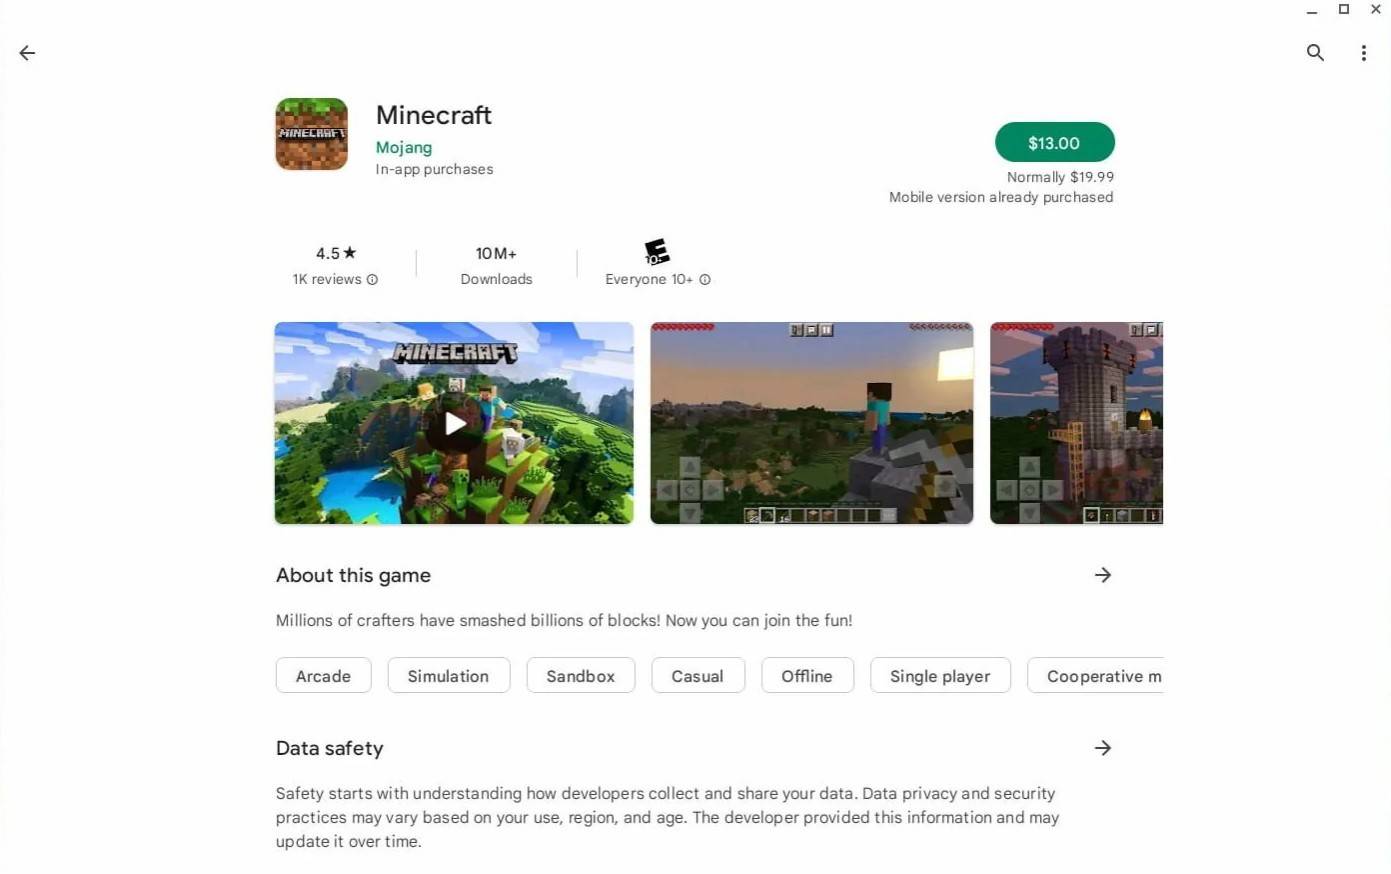
Image Source: aboutchromebooks.com
For users with lower-end Chromebooks, we’ll cover optimization techniques next to ensure smooth gameplay.
Running the Game
After installation, launching Minecraft is straightforward. Simply search for the application in your apps list or execute it via the Terminal. From there, log in with your Mojang account credentials and start building your world!
How to Play Minecraft on a Chromebook with Low Specs
If your Chromebook doesn’t quite meet the recommended specs, don’t fret. There are several ways to enhance performance and make the game playable.
Adjust Graphics Settings
Lowering the graphics quality can significantly reduce strain on your system. Navigate to Settings > Video Options and adjust sliders accordingly.
Close Unnecessary Background Apps
Running multiple apps simultaneously can hog resources. Close any non-essential programs to free up memory.
Clear Cache and Temp Files
Regularly clearing cache files ensures smoother performance.
rm -rf ~/.minecraft/cache/*Enhancing Performance on Chrome OS
For users with Chromebooks lacking robust hardware, consider the following tweaks:
- Enable Hardware Acceleration: Go to Settings > Display > Advanced > Hardware Acceleration and toggle it on.
- Limit RAM Usage: Allocate a fixed amount of RAM to Minecraft to prevent system overload.
By following these steps, even budget-friendly Chromebooks can deliver a decent Minecraft experience.
Stay tuned for more tips and tricks to maximize your gaming potential on Chrome OS!